Enabling two-factor authentication on your client area login, you significantly enhance the security of your account, reducing the risk of unauthorized access and potential data breaches.
Here's a step-by-step guide on how to enable 2FA on your client area login:
- Log in to Your Client Area: Begin by accessing your client area using your username and password.
- Once logged in, navigate to the top right, where your name is and click on the arrow of "Hello YourName".
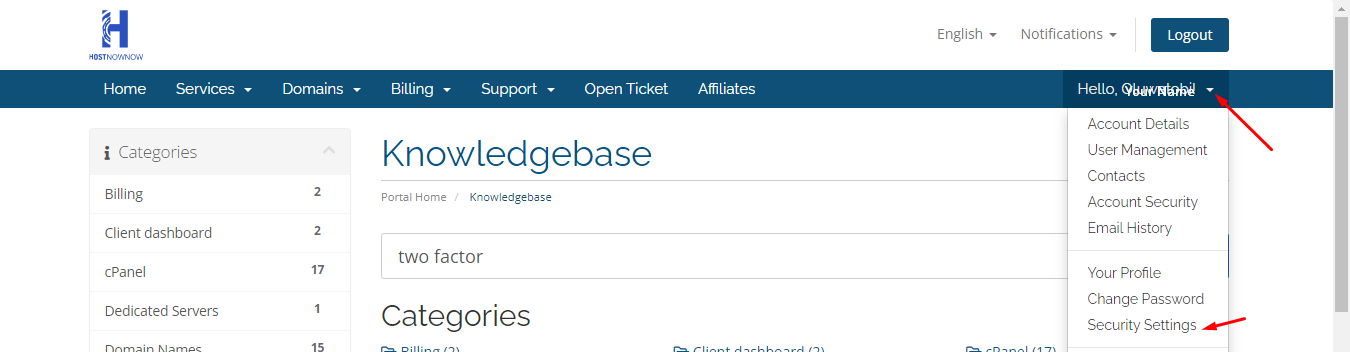
3. Look for the option to enable two-factor authentication. This feature is labeled as "Security Settings,"
4. Click on "click here to enable".
5. Select the Time Based Tokens service.
6. Scan the QR Code: Scan a QR code displayed on the screen using an authenticator app, such as Google Authenticator on your smartphone or tablet. This QR code links your client area account to the authenticator app, generating time-based codes for authentication.
7. Verify the Code: Once you've scanned the QR code, the authenticator app will generate a temporary code.
8. Enter in the 6-digit code that the authenticator app generates.
9. Click on the "Submit" button and record the Backup Code in a safe place offline.
10. Test the Setup: To ensure everything is working as intended, log out of your client area and attempt to log back in. If successful, congratulations—you've successfully enabled 2FA!
